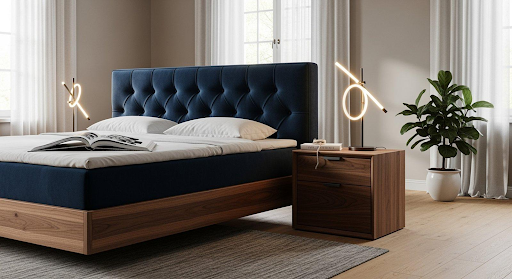
Before you begin installing your bedroom panels, careful planning and preparation are essential. This ensures that everything fits perfectly and you don’t encounter any problems along the way. Proper preparation saves time, prevents stress, and ensures that your new bedroom panels look beautiful.
The better you prepare, the better the end result will be. Allow enough time to gather all materials and tools and thoroughly prepare the walls or ceilings.
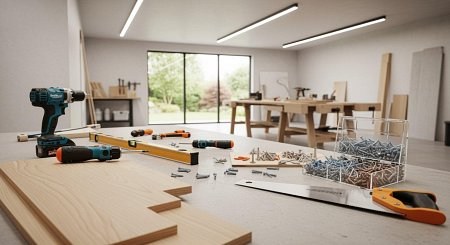
Tools and materials: What do you need?
There are a number of tools and materials you’ll need to install bedroom panels. Use this list to check you have everything:
| Tools | Materials |
| drill | bedroom panels |
| Cordless screwdriver | Construction batten |
| Hand saw/jigsaw (possibly circular saw) | Screws, dowels, nails |
| Hammer | Insulation material (if necessary) |
| spirit level | PE-Foil |
| ruler, pencil, square | End strips |
Always ensure that you use the right quality materials and tools, and that everything is suitable for the respective surface. For damp rooms, stainless steel clamps with double fastening are a good option.
Prepare the wall or ceiling
The wall or ceiling surface must be dry and as level as possible (residual moisture content no more than 5%). Remove any loose plaster, dust, and grease. In older buildings, filler or drywall can help if the wall is very crooked.
If you want to glue panels directly onto plaster, make sure the surface is stable, solid, clean, and dry. For stone or concrete walls, a primer can improve adhesion. Old, sound wallpaper can stay, but loose wallpaper must be removed. This preparation is especially important if you want to install decorative stone cladding like those from Stegu , as these require secure and permanent bonding.
Moisture and subsurface control
Before installation, measure whether walls or ceilings are too damp. Excessive humidity promotes mold growth and damages the panels. The room temperature should be around 20°C (at least 15°C), with a humidity of 30-65%. Wood panels should be stored in the room for at least 24 (preferably 48) hours before installation. Check the load-bearing capacity: For lightweight walls, reduce the spacing between the batten profiles if necessary to ensure stability.
Protect and plan the space
Before you begin, cover furniture and the floor with plastic wrap to protect them from dirt and dust while drilling and sawing. Make sure the room is ventilated, especially when working with adhesive.
Consider where outlets, light switches, or lamps should be placed and mark the locations on the wall and panel. Work on electrical wiring should always be performed by an electrician.
Simple step-by-step instructions for installing bedroom panels
Even though installing bedroom panels may seem daunting at first, it’s easily manageable for experienced DIYers with step-by-step instructions. A well-thought-out approach keeps the job manageable and the result looks professional.
Whether you install with a substructure or by gluing, precision work pays off. The more carefully you work, the more beautiful your bedroom will be in the end.
1. Attach the substructure
The substructure provides support and compensates for unevenness. It consists of wooden slats. These are usually installed at intervals of approximately 40 cm – always perpendicular to the panel’s intended orientation. If, for example, you want the panels to lie upright, install the slats horizontally.
Short instructions for the battens:
- Mark the drill holes on the wall and battens (vertically and horizontally straight, use a spirit level)
- Drill holes and insert dowels
- Screw the slats firmly to the wall
- Constantly check straightness with a spirit level
- Use small wooden wedges to level out unevenness
- Leave 10-14 mm distance from the wall for air circulation
If you want to insulate, choose battens as thick as the insulation layer (at least 40 mm).
2. (Optional) Insert insulation or soundproofing
If you want additional sound or heat insulation, place insulation material such as mineral wool or foam between the battens. Then, you can attach a PE film for moisture protection. To improve air circulation, nail a second row of battens crosswise further up.
3. Cut and prepare panels
Measure the wall surfaces precisely. Cut the panels to size so that there are minimal offcuts. The first and last row of panels often need to be adjusted. It’s best to use a fine-tuning saw or miter saw. Tongue-and-groove panels often require a bevel for a clean finish against the wall.
Store wood panels in a room for at least 24 hours to acclimatize. When sawing, remember: with table saws, the nice side should be facing up, while with hand saws and jigsaws, it should be facing down!
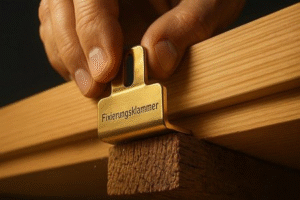
4. Install panels: screws, clamps, glue
Use these methods to attach the panels:
- Mounting clamps: Often used for wood panels. Slide the clamps into the groove and attach them to the battens—this allows the wood to move freely in damp conditions.
- Screws or nails: Possible depending on the panel and substructure.
- Gluing: Apply glue in zigzag lines to the back of the panels and press the panels firmly against the wall.
Start in a corner, leaving a gap between the panel and the wall. The next panel will be inserted into the groove with the tongue and groove. Check regularly with a spirit level.
5. Cut out sockets or switches
Mark precisely where sockets and switches should be located. After screwing in place, cut out the holes with a hole saw. Caution: Secure the electrical cables first! Use special cavity wall boxes for the new paneling to ensure everything sits flush. Please have any electrical work done by a professional!
6. Install end strips and edge profiles
End caps ensure a seamless transition between the wall, ceiling, and panel and conceal expansion joints. Cut the caps at a 45-degree angle at corners and attach them with small nails or glue. Special cap shapes are available for sloping ceilings. Avoid contact of the caps with silicone to prevent damage.
Common mistakes and simple tips for a clean installation
Typical mistakes when installing bedroom panels are easy to avoid. These tips will help you ensure your work is a success:
Common mistakes and how to avoid them
- Do not acclimatize panels: Store in the room for 24-48 hours before installation, otherwise the wood may crack or warp later
- Forget expansion joints: Keep at least 10-14 mm distance from fixed components so that the material can work
- Surface not properly prepared: Dirty or damp walls prevent adhesion, panels could warp
- Slats not installed straight: Always check with a spirit level
- Tighten clamps too tightly: Otherwise you will damage the wood
Tips for good cuts and precise joints
- For long, straight cuts: Use a hand-held circular saw
- For cross-sections: use a miter saw
- Beautiful edges: use a fine saw blade
- It is better to start on a straight wall and check frequently with a spirit level
- For narrow last row of panels: Use the remaining piece to mark the width
- Mitered corners for a beautiful transition
What to do if walls or ceilings are crooked?
Uneven surfaces are common, especially in older buildings. A new substructure made of wooden or metal slats can help here. Wooden wedges or spacers are used for leveling. Use a spirit level, or perhaps a laser, for alignment. For significant unevenness, you can smooth the wall beforehand with filler or drywall. Gluing directly onto an uneven wall can result in visible gaps.
FAQ: Answers to frequently asked questions about bedroom panels
Can panels be installed directly onto plaster?
This is generally possible if the wall is solid, clean, and dry. Be sure to remove any loose spots, dust, and grease. For heavy panels, you’ll need a high-performance adhesive. If the wall is uneven, you should smooth it out beforehand or build a substructure to level the surface.
How do you install panels on uneven surfaces?
In this case, a substructure made of slats or metal profiles is recommended. Small wooden wedges or spacers ensure that the slats are perfectly straight. Use a spirit level to check the alignment. This way, you can achieve a level cladding even on sloping surfaces.
How much distance do I need to leave from the wall?
Leave a gap of 10-14 mm all the way around between panels and all fixed components—this is the so-called expansion joint. This gap is especially necessary with wood, allowing the material to expand slightly with changes in temperature or humidity. These gaps will be covered with battens later.
Can the panels be removed later?
This depends on the installation. Panels on substructures can usually be removed easily, whereas glued ones often require damage to the plaster. In rented apartments, it is recommended to use nonwoven wallpaper as a tear-off base before gluing – this way, both can be removed together later.
Summary: Installing bedroom panels yourself made easy
Installing bedroom panels isn’t an insurmountable task with a little preparation and the right tools. The effort is worth it: Panels are not only a visual highlight, but also offer many advantages. They create a cozy ambiance, improve acoustics, save energy, and conceal old walls or cables.
Plus, a wide range of designs, materials, and colors are available—from wood to fabric finishes. With patience and careful work, you can create a beautiful and functional bedroom that you’ll enjoy for a long time.